In this tutorial, we will show you how we can remove the background from an image step by step using Photoshop 2021. You can easily add a white background or a different colour background, and you can add any other background.
It is very important for E-commerce Retailers, photographers, and marketing professionals to save time. Through this tutorial, you will learn step by step how we can easily remove the background from an image by using Photoshop 2021.
Achieve free tips for e-commerce and product photography
Many people become frustrated while editing images when they remove the background from any image. Most of the time, they ruin the image while trying to remove the background of an image from the hair. In this Photoshop tutorial, we will learn how we can remove the background from hair with “select and mask”. If you learn once, “How to remove background from hair in Photoshop 2021” then you can remove background from any image.
Main image for removing background from hair.
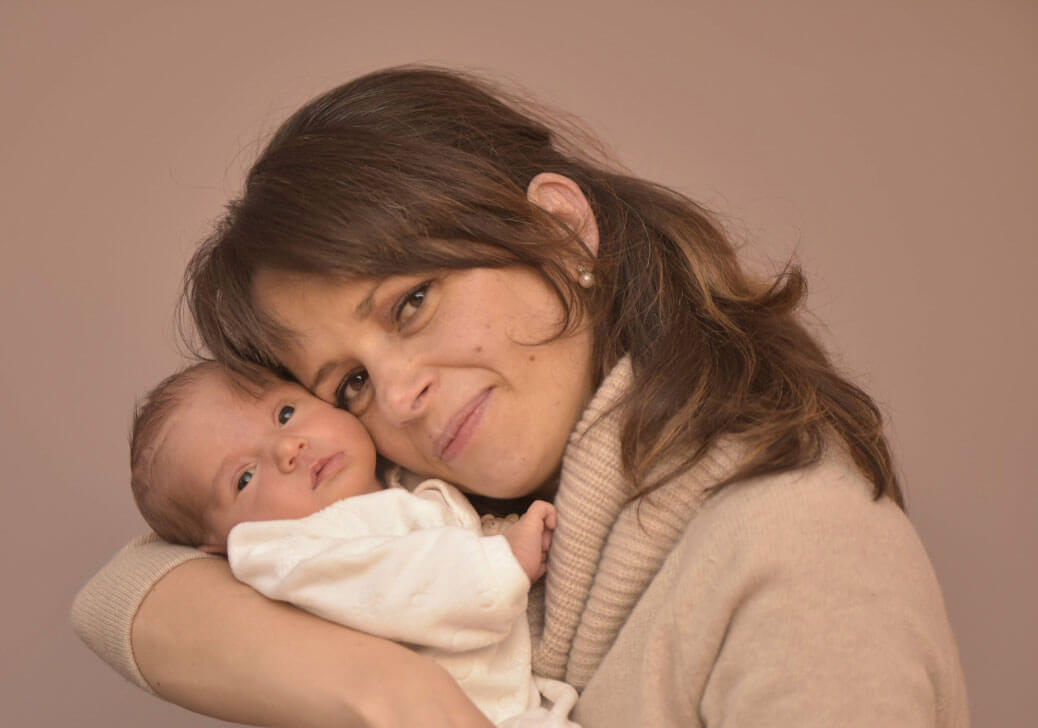
After using a different background
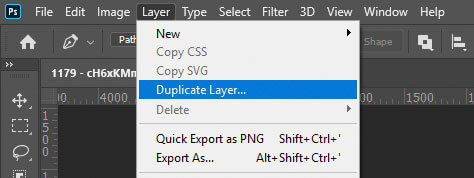
Step 01. Make a Layer Copy
After opening the image in Photoshop we have to take a Layer Copy from background layer.
To take a layer copy we have to go layer> Duplicate layer> Ok from Photoshop menu bar.
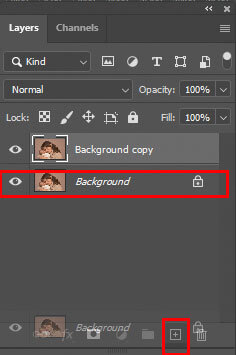
Or you can use a layer copy by dragging the background from the Layer panel.
Step 02. Select subject
Select subject is a very powerful feature of Photoshop. With this feature to select main subject we don’t need to take any help from toolbox. We can select the main subject automatically. You need to click it once. Wondering! How to do this? This is an updated feature of Photoshop.
For auto selection of main subject go to select from menu bar and from there, click on the subject.
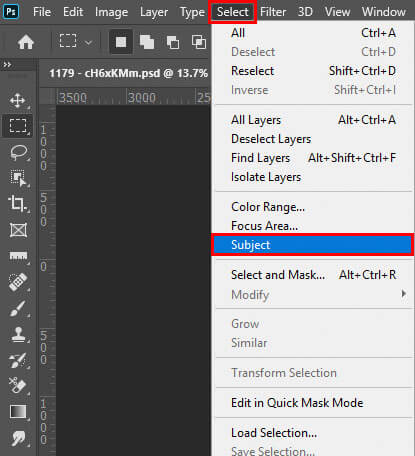
Now see your main subject will be selected. We told you that we can select the main subject in just one click. Now this is proved.

Advantages of Select Subject
The main advantage of select subject is it is less time consuming. Which is very important for a person? To select main subject previously we used Pen tool, Lasso tool, Magic tool etc. Nowadays this is a very useful feature of Photoshop.
Read More : How to use the Photoshop Pen tool
Disadvantages of Select subject
Although there are some advantages of Select subject but there is some disadvantages also. When we use Select subject tool sometimes the edges are not smooth. For this we need to use some other tools of Photoshop. For this we personally recommend pen tool. You will see how we can Remove Background by using Pen tool.
Step 03.Select and Mask
After Subject selection we will use slight Feather in selection. We will press Shift + F6 from keyboard or we can click Select> Modify> Feather from menu bar.
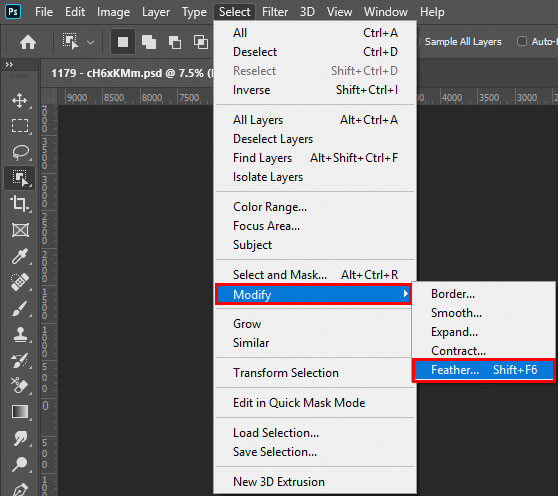
Now a dialogue box will appear. We will give Feather radius value 1 pixel from dialogue box and click ok.
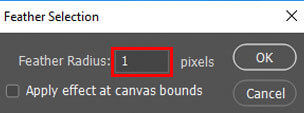
Feather is used to make the edges smooth of main subject. As a result the edges look smoother.
Now from menu bar we will click select and mask.
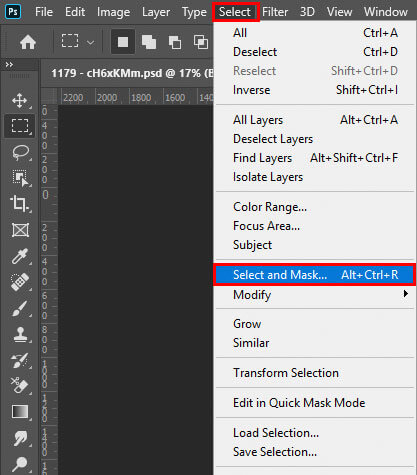
Keyboard Shortcut Ctrl + Alt + R
Step 04 . Refined edge and brush tool
If we click Select and mask a dialogue box will appear. This dialogue box is very important to remove background from main subject.
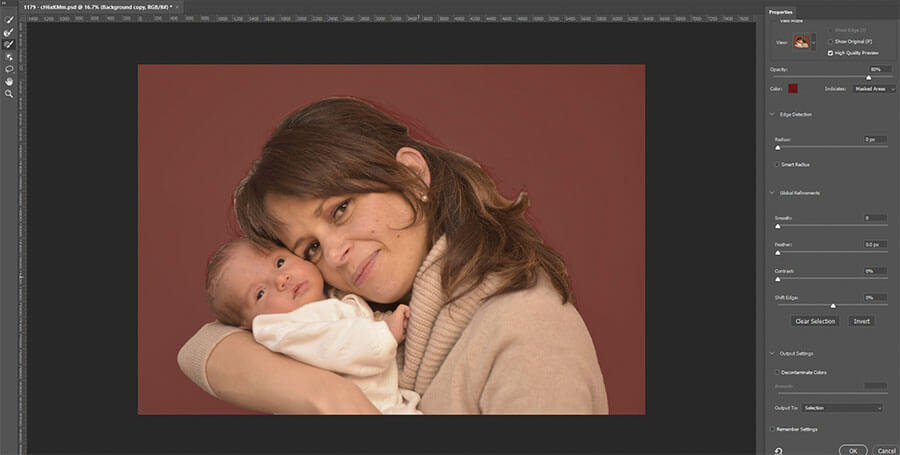
If you notice the left side of the dialogue box you will see some Tools. Again if you notice the right side you will see some options. Different tools are used for different types of work.
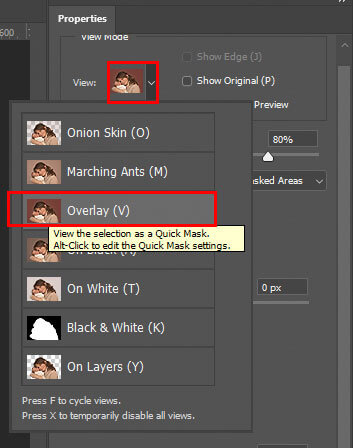
From right sides view option we will select drop down icon then from there we will select Overlay option.
Opacity will be 80% and Masked areas will be selected.
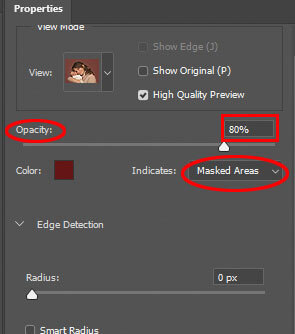
If we take the opacity a little then we will understand how much subject is being selected. Because if we take 100% opacity then it will be a little difficult to understand how much subject is being selected and how much we need to refine.
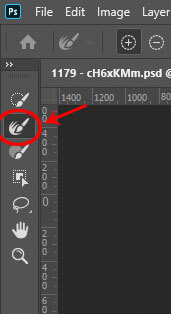
We will select Refine edge brush tool from right side tool bar.
Press Ctrl + Space from keyboard and drag the computer mouse. Then the image will be smaller or larger. To make the Refine edge brush tool smaller or larger press Alt and click right button of the computer mouse to move.
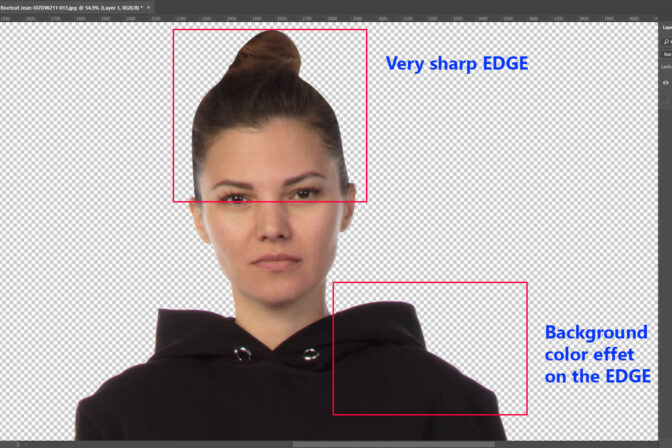
If we zoom in the image a little then the edges will be clearly visible.
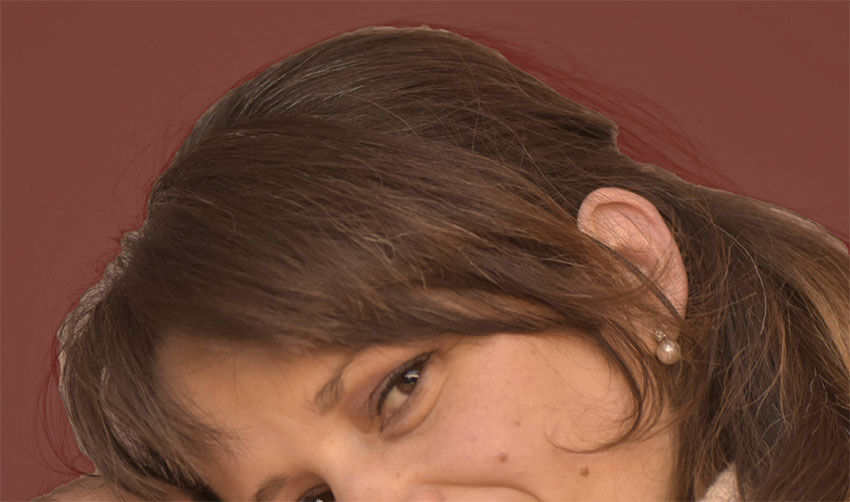
Without subject hair the edges which we can see those are background. In this background we can slightly see some hairs. Now with Refine edge brush tool we will slowly paint on the edges and then on the hairs which are slightly visible.
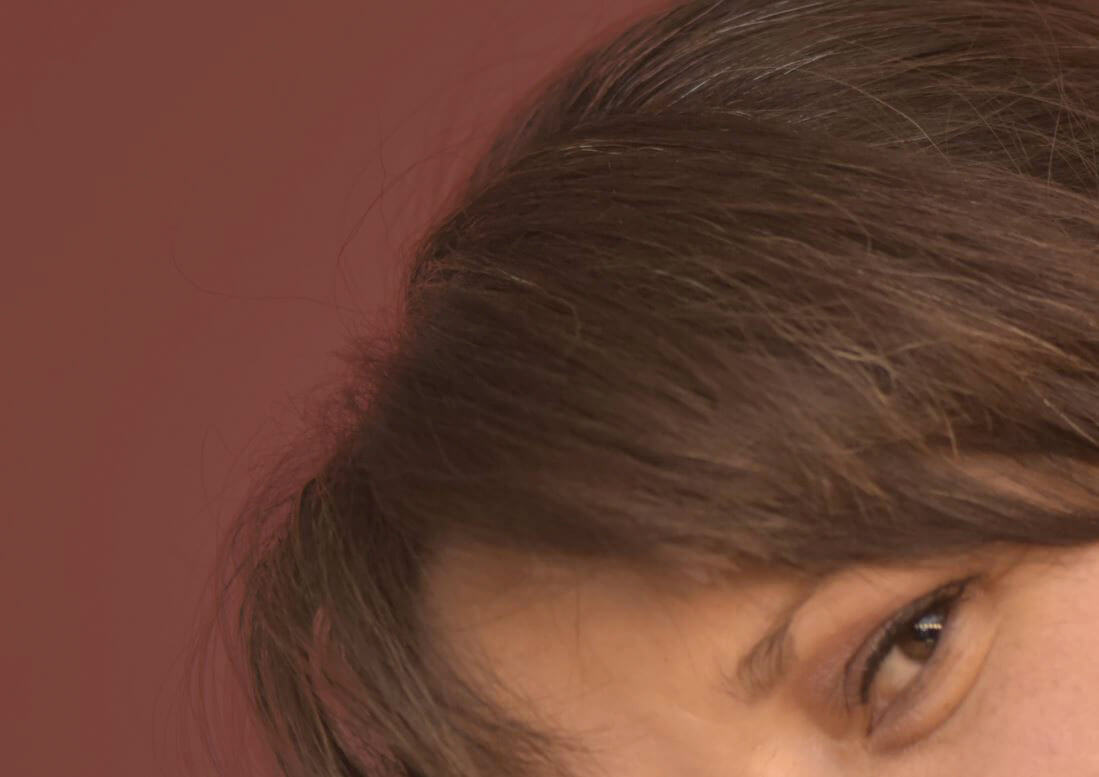
After painting see all the edges are looking smooth.
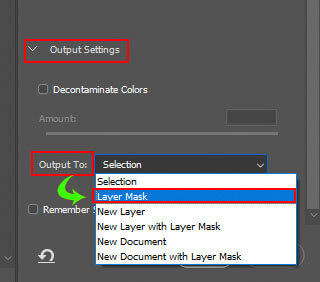
Step 05 . Output settings
After using Refine edge brush tool on the whole image click on Output settings from Right side. Now click Selection in “Output to” then select Layer Mask and ok.
Results of Output Settings:
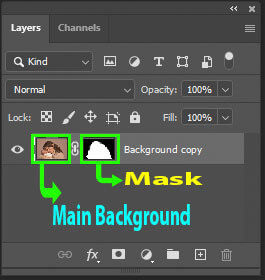
Layer Mask
If you select layer mask on Output settings then Layer mask will be done on the layer which had been selected.
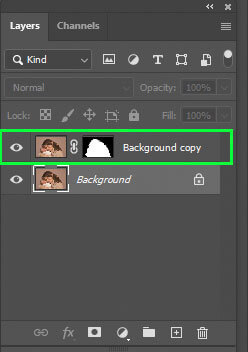
We did Selection on Background copy layer and on that layer we did select and mask. For this reason layer mask is done on Background copy layer.
New Layer
If we select New Layer Option in Output settings then in main layer panel a new layer will be automatically created from selection layer.
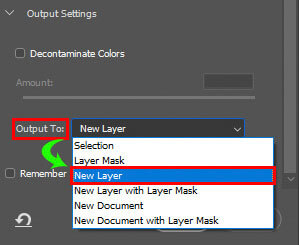
New Layer set on Output settings
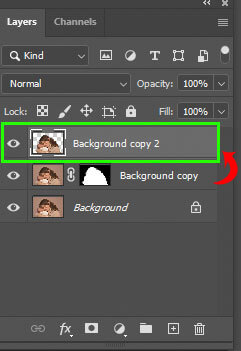
Result of the main layer panel
New Layer with layer mask
If we select new layer with layer mask option then in main layer panel a new layer will be created of that layer from selection layer and layer will be masked.
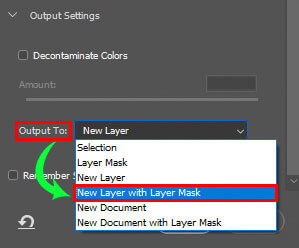
New layer with layer mask set
Set after New Layer with layer mask
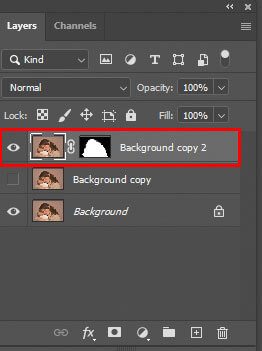
We have a background copy layer selected here. We remove background from hair by using select and mask and take “New Layer with layer mask” in Output settings. Due to this the Background copy layer has been hidden and a new layer has been created with mask.
New document result on output settings
We saw New Document option in any Software or application. New Document is a blank document. There will be no layer on this.
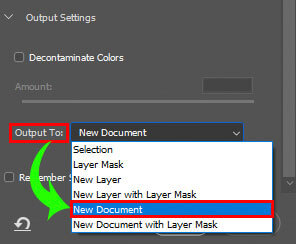
If we select New Document option from output settings and press OK then the image will be open in a transparent single layer in a new document.
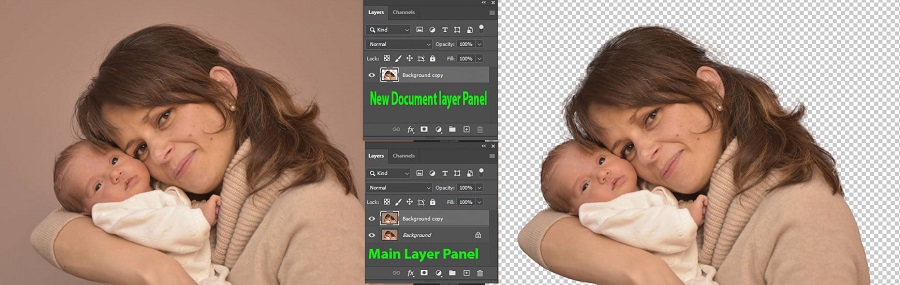
New document with layer mask settings
New document option and New document with layer mask option is almost same. But there is a little difference. If you notice Layer Panel then you will see the layer is masked which is on the main Background and the image will be transparent. If you press Shift and click on Mask Icon then you will see main background.
Read More : Clipping Path and Image Masking
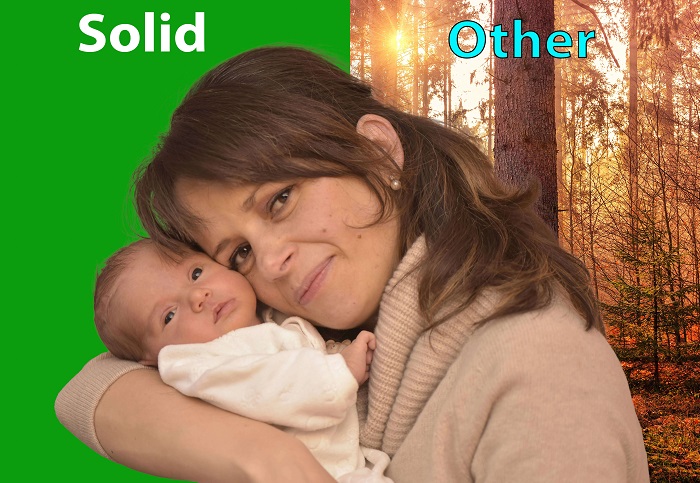
Step 06.Replace Background
Very easily we removed background from hair. Now this file is ready to change in any background.
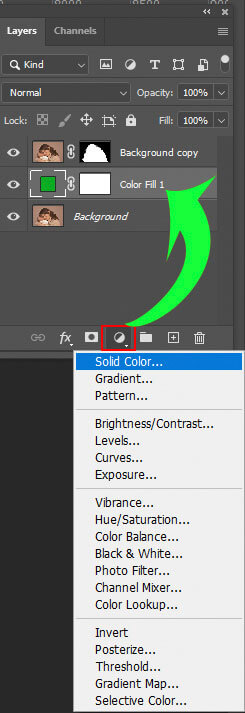
You can use any solid color by clicking Create new fill or adjustment layer from Layer panel. Or you can attach any background as per requirement.
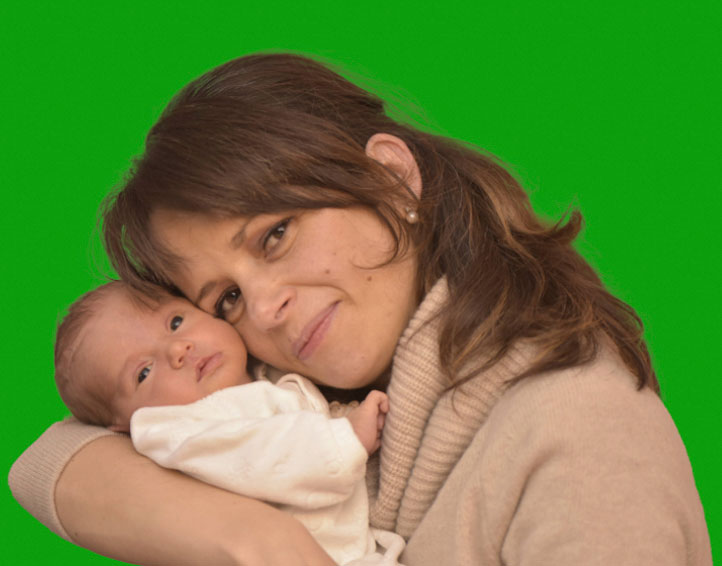
Solid Color Background
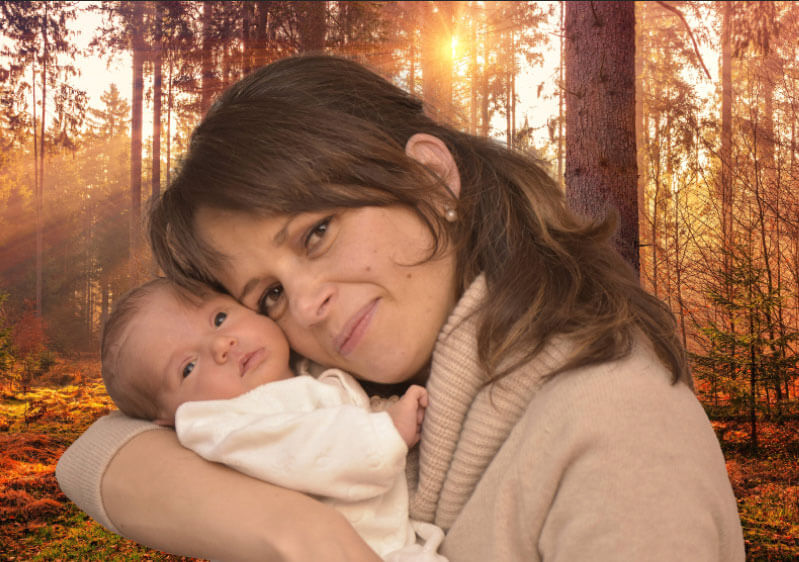
Another Background Add
We just show you how we can remove background from hair in Photoshop 2021 by using Refine edge.
Final Note: In addition to Photoshop 2021 you can also do it by Photoshop cc2019. Rather than Photoshop CC we can also remove background from hair by using any version of Photoshop. Without Refine edge How to Quickly Easily Remove a Background in Photoshop.