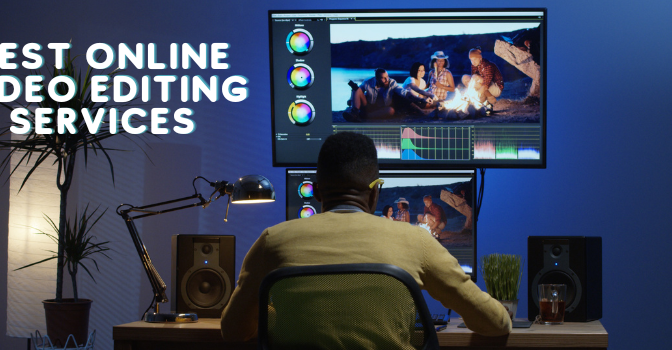

In this digital era, we try to make a general idea about a thing by seeing pictures of that person or the object. This is why the importance of picture is immense in our daily life. The pictures must be informative and clean if we want the viewers to know the correct information. There can be various types of noises and objects in the background while clicking a picture which can cause problem to differentiate between a subject and an object. That’s why the unuseful objects has to be removed keeping only the subject in the image. And the background has to be made transparent if you want the subject to be in your desired background. Also for using in websites the image and the logo has to be made transparent.
Today we will see how to make the background transparent in 1 minute using Photoshop.
In Adobe Photoshop we can make the background transparent in multiple ways. But today we will see how to make background transparent in 1 minute. That’s why we will discuss about the easiest way about it.
Procedure of making the background transparent of a product image in 1 minute
- The required image has to be opened in Adobe Photoshop.
- Selection of the image has to be made.
- The background has to be removed.
- The image has to be exported in the required format.
Step 1- The subject image has to be opened in Adobe Photoshop:
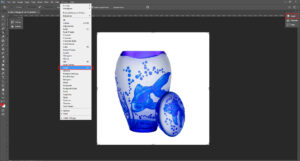
At first the subject product image has to be opened in Adobe Photoshop.
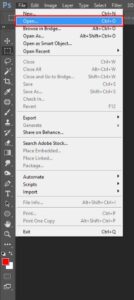
The image can be in any format e.g. JPG, JPEG, PSD, TIFF, PNG, PDF etc. We are going to open an image of a product in JPG format which has been suited in a white background.
Next we will have to open layer panel of photo Shop. To do this we are clicking the ‘window’ of menu bar of Photoshop where some drop down options will appear and then ‘layer’ menu can be found there.
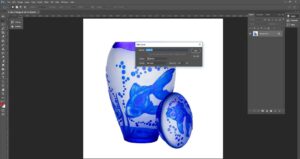
Then the layer box will appear. Now after double clicking on the background layer a ‘layer 0’ written dialogue box will pop up, there ‘ok’ button should be clicked.
Now you may find that the lock sign beside the background layer has disappeared. And now we can remove any part from this layer as per our need.
Read Also: Avoid 10 Mistake Made By Beginning Background Removal Services
Step 2- To make image selection:
Now on pressing ‘w’ of keyboard the magic tool will be activated. With mouse clicking on magic tool and holding, two tool will be seen, one is magic selection tool and another one is magic wand tool. From there magic wand tool has to be selected.
Now by pointing magic wand tool on the background, outside the product has to be clicked. We will see that only the background has been selected excluding the product. But for some images the whole background selection on one click may not be possible.
Specially if there is shadow of the product on the background, the background may not be selected in one click. For that the unselected area of the background has to be selected by pressing ‘Alt button’ and magic wand tool. In this way gradually the whole background has to be selected.
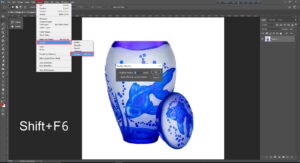
Now clicking on ‘select’ in menu bar many options will appear in dropdown menu. From there ‘inverse’ option has to be selected. By doing this the product will be selected leaving the background unselected. Now with the selected product shift+F6 has to be pressed or clicking on ‘select ‘ from menu bar a drop down menu should appear and from there clicking on ‘modify’ option, another dropdown menu will appear. From there clicking on ‘feather’ option a dialogue box will appear. In the dialogue box 0.5 has to be written and then ‘ok’ has to be pressed.
 Because of feather the pixelated nature of the image will become smooth.
Step 3- Background remove
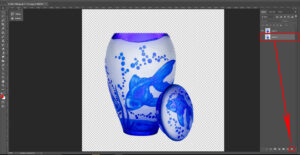
Now by pressing Ctrl+J the product image has to be transferred to a new layer. The product is now separated from the background. In Layer box under Layer 1 there is Layer 0. That layer has to be dragged on delete icon or the delete button on the keyboard has to be pressed. Then Layer 0 will be deleted. The image will become completely transparent.
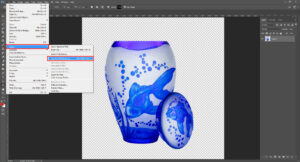
Step 4- To export format image according to need:
Image exporting is the most vital step in image transparency. There are many types of file in Adobe Photoshop to export image. But image doesn’t become transparent on every format. That’s why the correct format has to be chosen for keeping the image transparent.
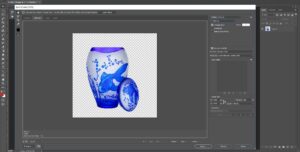
The most famous format for keeping the image transparent is PNG. There are 2 ways to save the PNG format. One is to normally save it from save option and another one is save for web. If the normally saving option is used then it increases the weight of the image and causes problems while using the images in websites, which doesn’t happen if the PNG format is saved for web.
Although not all formats can be saved for web like PSD, TIFF, EPS, PDF etc.
Only JPEG, PNG-8, PNG-24, GIF, WBMP formats can be saved for web. Here the dimension of the image can be changed according to desire even the size of the image can be corrected.
In web, a PNG format can be saved in 2 ways. One is PNG-8. The advantage of PNG-8 is that its weight is comparatively less. A picture will be saved in some colors which can be corrected from here. Here are 2-256 types of color choice option.
Another one is in PNG-24. To export good quality image, PNG-24 option is the best, though the image weight will be more than PNG-8 in PNG-24.
According to the need all the options discussed above has to be done and save button has to be pressed. Then another dialogue box will appear there it will be asked where I want to save my files in hard drive. Upon selecting the desired drive, the transparent image will be saved.
Now if we want we can use this transparent image on any desired background. We can even upload it directly on any website.

Real Also: Differences of Clipping Path and Background Removal
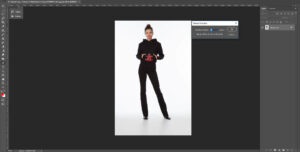
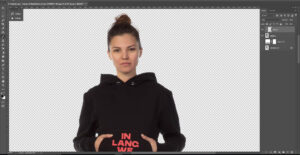
Procedure to make the background transparent of a model image in 1 minute:
To make the background of model image transparent is yet another very important task as to make the background of a product image transparent in Adobe Photoshop. The background transparent method of model image is quite the same as product image but there are some extra work. We will discuss about all of those works.
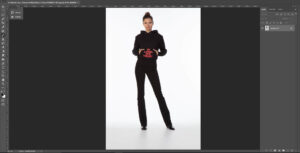
Like before, the model image has to be opened in Adobe Photoshop. To select product image we used Magic wand tool but for model image we will use Quick selection tool and side by side some other tools. At first pressing on ‘W’ button magic tool has to be selected, if quick selection tool cannot be selected at once then it has to be selected from magic tool bar where more 2 tool will be seen, from there quick selection tool has to be selected. Now according to need adjust the size of quick selection tool and carefully click on image and notice carefully so that the selection doesn’t go out of the image. In this way selection has to be done perfectly as much as possible.
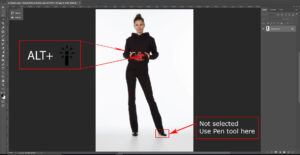
If there is shadow under the feet of model then fine selection cannot be done by quick selection tool. For that selecting magic wand tool from toolbar and pointing on the portion that is outside the image, mouse has to be clicked pressing on Alt key from the keyboard. Then the selection will be seen quite perfect. If still not then Pen tool has to be used.
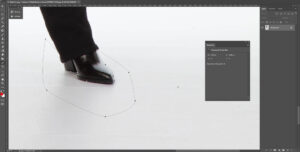
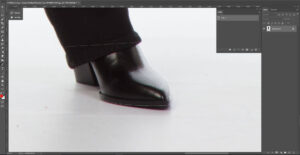
After selection by pen tool, to remove the outside part Ctrl+Alt+Enter and to add Ctrl+Shift+Enter has to be pressed.
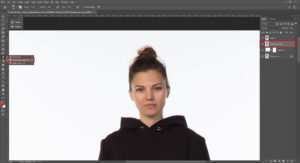
Now it will be seen that the selection is done perfectly except the hairs. The image has to be taken in a new layer. To do this, from Photoshop menu bar selecting select> Modify> Feather and putting feather as 0.5 and then Ctrl+J has to be pressed. Now it will be seen that the hair of the model is in cut.
Now to select the hair perfectly we have to do hair masking.
Hair masking is an important work of Adobe Photoshop. This is a type of work for which the designer has come up with different techniques. One single technique does not work for all types of hair masking job.
For hair masking in adobe Photoshop there are different ways. Like- erase masking, refine masking, channel masking, color range etc.
For this image we will use erase masking. For erase masking ‘E’ has to be pressed in keyboard or by clicking on the erase tool from the toolbar of Photoshop where 3 tools will be shown, Background Eraser Toll has to be selected from there.
Real also: 5 Easy Way to Photo Manipulation Techniques Faster
In Background Eraser Tool some adjustment is necessary. Like-
Sampling= Once
Limits= Discontinuous
Tolerance= as per need
Brush size= as per need
Hardness= as per need
Spacing= as per need
Angle= as per need
Roundness= 100%
The upper stated options has to be adjusted and then the background layer has to be copied from the layer box of the model image whose name will be Background copy. Now from under the background copy layer A solid color layer of any color has to be taken which shall be under the Background copy layer. We have chose white color.
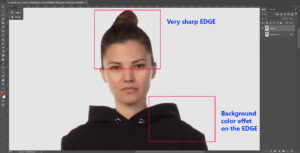
Now it has to be erased using the brush that was set earlier in background copy layer. Now it will be seen that the background is being deleted leaving the hair and it shall be looking natural. A type of effect will be seen on not only hair but also on the dress of the model. Which is definitely not looking good.
Now this red lines effect has to remove. For which a blank layer has to be taken on top of all the layers. And the layer mode has to be made “Color”.
And then brush tool is to be selected whose opacity will be 100. For this image we are giving the opacity 100, but it is not necessary in all the images to be 100. Depending on the image the opacity can differ. Now using the brush the red effects has to be brushed out from the image. And while brushing care has to be taken so that the source color is immediate source color. Then it will be seen that there is no red effect anymore.
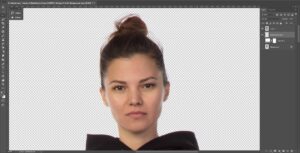
We have finished making the model image transparent job. And it is possible to do all these steps in 1 minute if the designer is very expert in this sector.
And there is nothing to say new about image export. Model image export follows the same procedure as it was done for the product image export.
Get a Free Trial of Image Editing Services