Face Swap is a very important and authentic work of Adobe Photoshop. Before knowing how to do Face Swap easily in Photoshop you have to understand what is Face Swap? Why Face Swap is needed?
Basically Face Swap means cutting one face from an image and place it in a different image through Photoshop.
There are two types of face swap, one is replacing same person face image in his/her another image. Another is between two different people replacing one persons face with another person’s face
Why Face Swap service is needed
Face Swap is needed for different purposes. Face swap is not always an ethical/legal work. If Face Swap is not used for insulting a person socially or personally and blackmailing someone then it will not be considered as unethical or illegal.
Face Swap is basically used for editing kids or children’s image. Besides that Face Swap is needed to edit group image.
So before doing Face swap a designer should have a clear knowledge of purpose of this job. For example: why and where the edited image will be used. If it’s needed designer have to collect written agreement. Because in future if any Legal problems arise for the edited image the designer can defend himself/herself. As internationally it is considered as a punishable crime but not in all cases.
Below we will discuss about two different types of face swap.
Same person to same person face swap
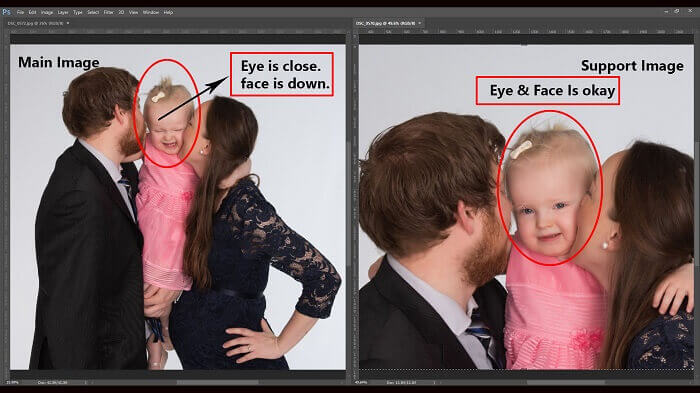
Basically same person to same person face swap is used in baby photography and to edit group photograph. Some times when a baby’s photo is being clicked he/she does not keep steady or he/she do not understand that there photo is being taken and he/she have to pose or keep steady, so the photographer click random pictures and later it can be seen that one image face looks perfect but the body parts or other parts is not looking perfect, in that case we will chose a picture which body posture looks perfect but face part looks imperfect then we will cut the face part and place it in that image which body pasture looks perfect.
Sometimes when we take a group image everyone’s picture might not be perfect at once. Maybe someone’s eyes are closed. Maybe someone is looking at other side. In these cases face swap is needed.
Process of How to do Face Swap easily in Photoshop
1. First we have to open the image in Adobe Photoshop that we want to do face swap. To open the image we have to select File>Open from Photoshop menu bar. Or you can drag and drop the image on Photoshop.
2. Before opening the image we have to be careful that the face of both images should be at same side or images angel should be same side.
3. Now in the same way we have to open the image in Adobe Photoshop that we want to cut the face from.
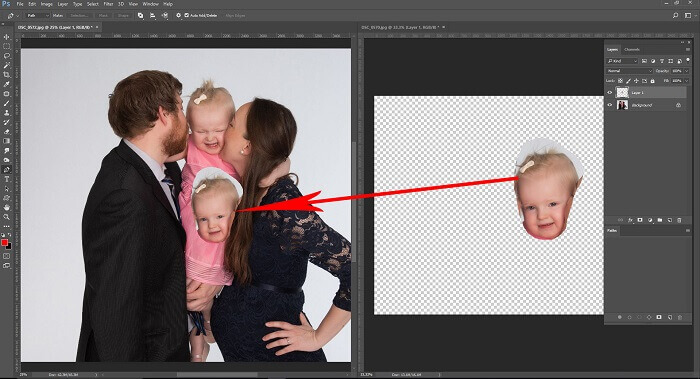
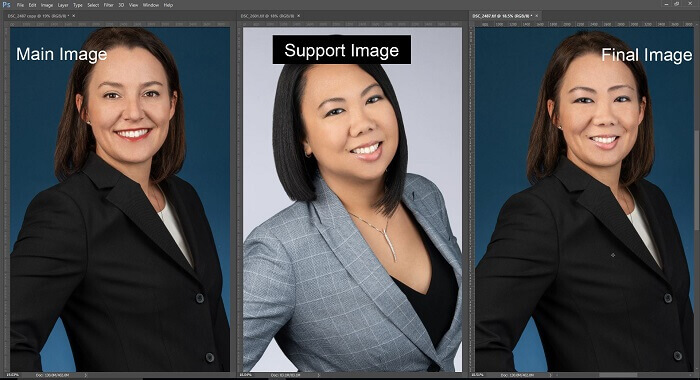
For Example- the image on which we have to work on named as main image and from which we have to cut the face named as support image.
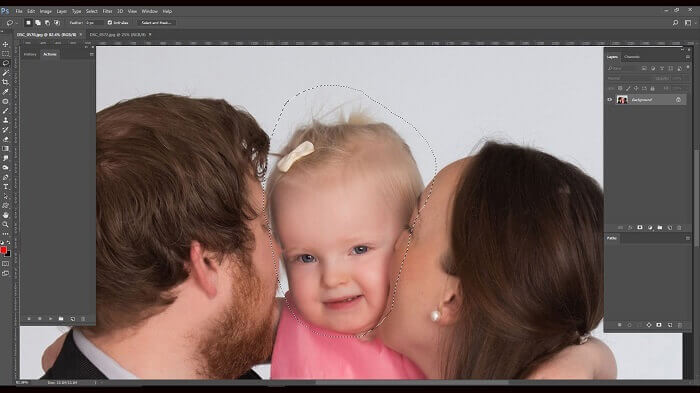
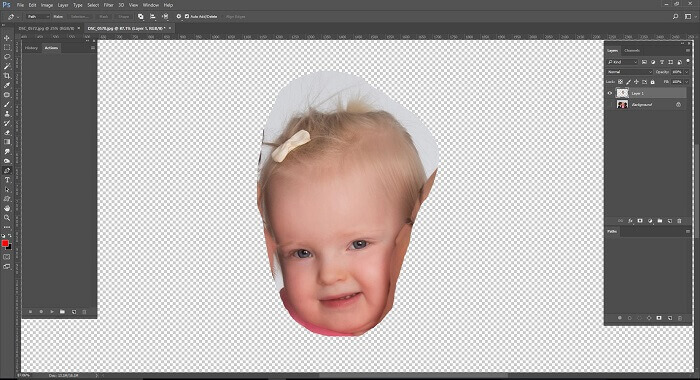
Now we have cut the baby face from the right side image or support image and place it in the left side image or main image.
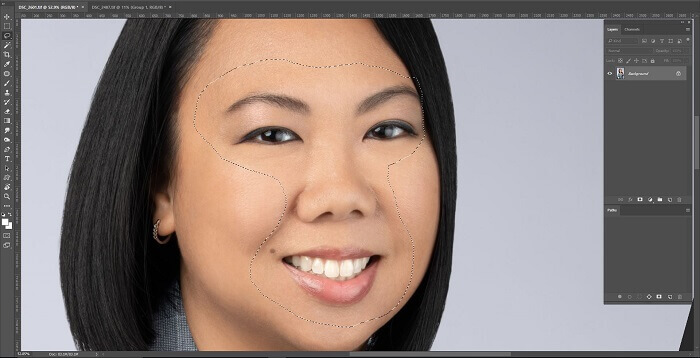
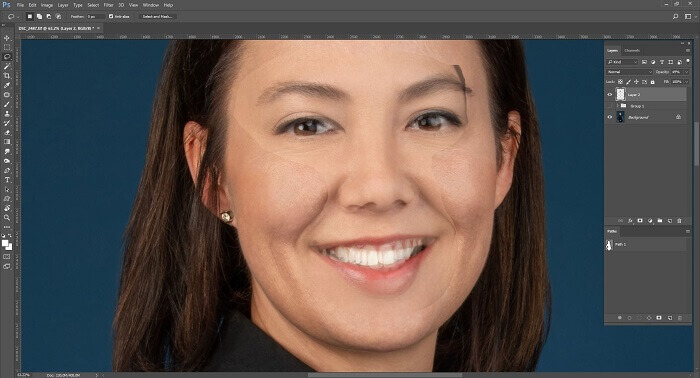
We have to select Lasso tool by keeping the support image in front. Or we have to take a tool with which we can do selection for example- Polygonal Lasso tool, Magnetic Lasso tool, Pen tool etc. Now with any of the above mentioned tools we have to select the parts of the image as needed and cut it out.
Read also: 5 Easy Way to Photo Manipulation Techniques Faster
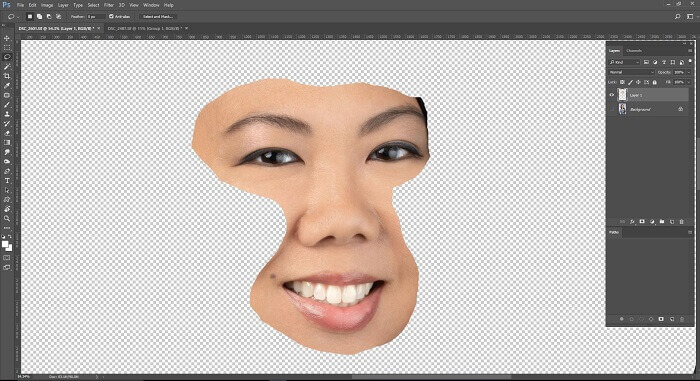
After selecting from Photoshop Menu Bar we have to click Layer> New> Layer Via Copy or we will press Ctrl+J from keyboard. Then the selected part will move in to new layer. Now we have to keep the main image and new layered image side by side. As we kept two images side by side so we will drag the selected baby face part that we cut out from support image and drop it in the main image by pressing Shift in keyboard. Now support image will be on the main image. Now we have to close or remove the support image from Photoshop.
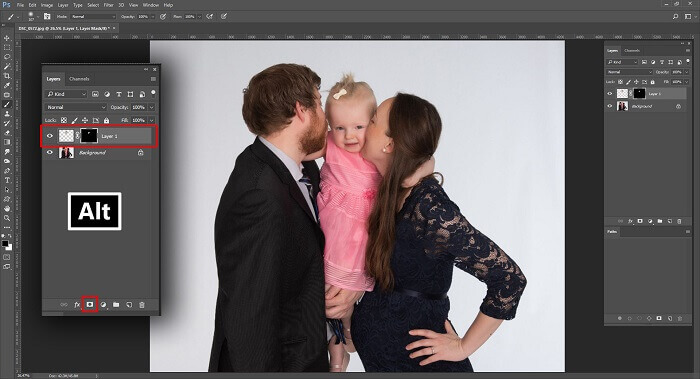
Now we have to place the baby face perfectly in the main image, while placing the image we have to be careful that the images eyes, nose and mouth should in right position.
Now we have to Black Mask the support layer or by selecting support layer and by keeping the Alt button pressed from keyboard we have to click Add Layer Mask button which is at the bottom of Dialogue Box. Then we have to select brush tool from tool box and brush on Black Mask by keeping the foreground color white. We have to enhance the image as needed by brushing the image.
By this way we can make a bad image look good with the help face swap technique.
One Person to Another Person Face: Earlier we saw how we can repair someone’s bad or imperfect image by cutting the face part from a perfect image. Now we will see how we can change the face of an image by cutting and placing another face image.
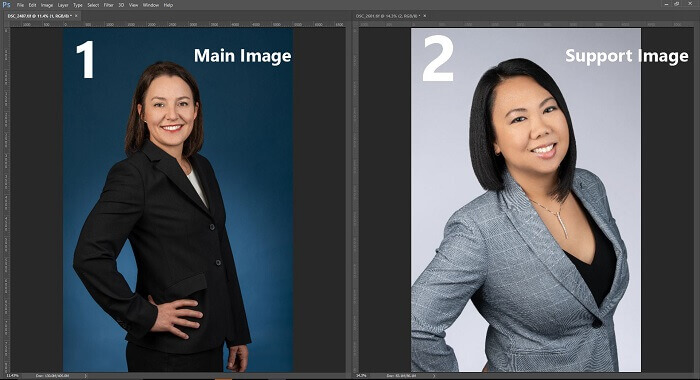
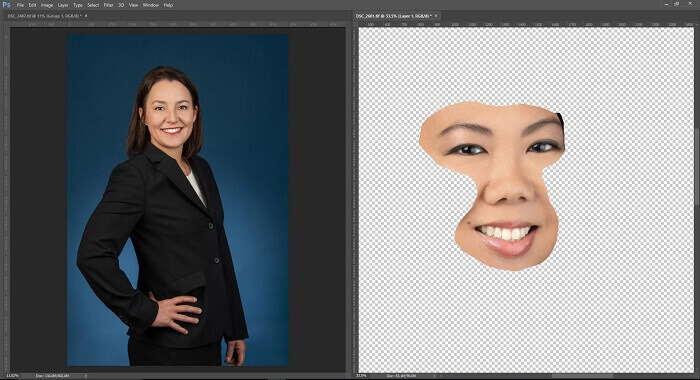
Same as before we will open two selected image in Adobe Photoshop. Here we will assume no-1 image as main image and no-2 image as support image.
In that case you have to maintain that the support image and main image should be in same angle. Same as before we have select face part from support image and place it in a new layer.
Read also: How to make background transparent in 1 minute using Photoshop
Now we have to place the two images side by side, to see the images side by side we have to click Window> Arrange> 2UP Vertical of Photoshop’s menu bar. Now we can see the images are positioned side by side.
Now we have to place the image part of new layer which we take from the support image on the main image.
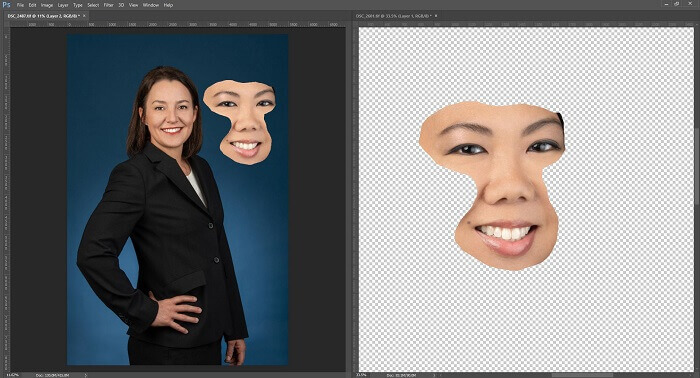
We have to place the support face on the main images face flawlessly. Same way that was set up before. To match the nose, eyes, mouth part flawlessly we have to minimize the opacity of support layer so that we can see the underneath image clearly.
Now we have to make the support Image Opacity 100%. Now we have to take a copy of background layer. To take a new copy we have to drag the background layer and drop it on the Create a new layer option of layer box.
Read also: How to Quickly and Easily Remove a Background in Photoshop
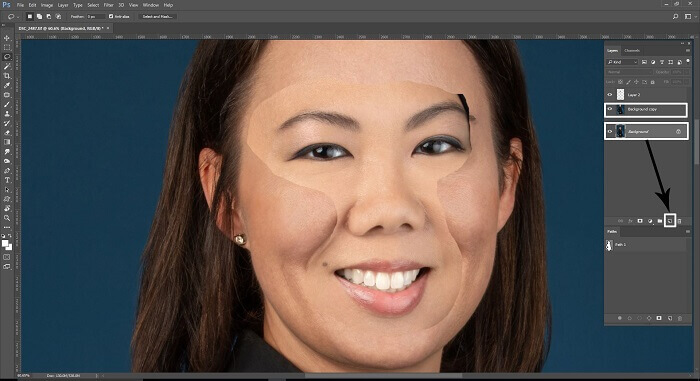
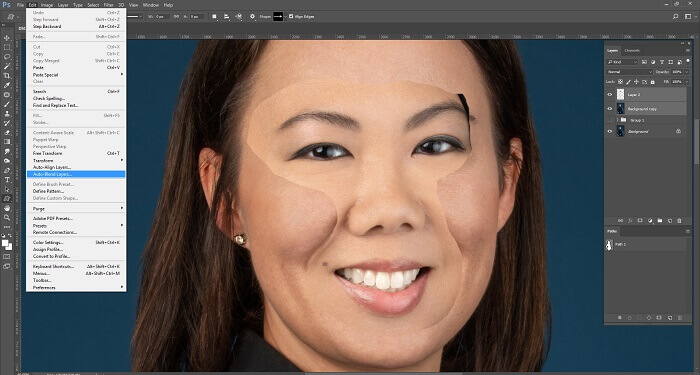
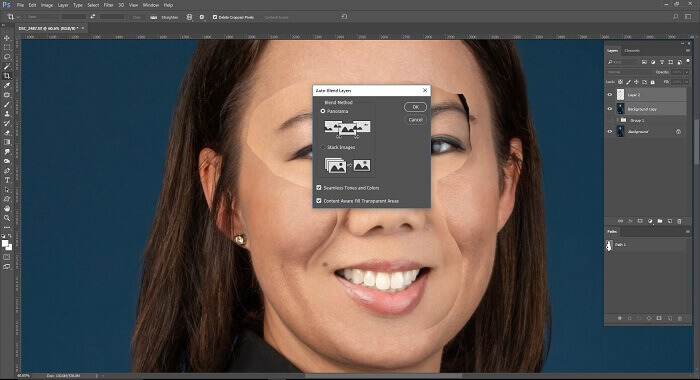
Now a new background Layer is created. Now we will select Layer 2 that means support layer and background copy layer together and click Edit> Auto Blend Layers from Photoshop Menu Bar then a dialogue box will appear from there we have to select panorama after that two layers will automatically blend together and it will create a unique face.
and the result will be like that

Finally we can say that face swap is an interesting task but before doing this we have to maintain some principles and ethics. We have to keep in mind that no one should be socially harmed for this act. But if this task is used for any imperfection of the image then it will be not against any ethics.