
Gif is a file format, Gif- Graphic Interchange Format. A Raster Graphics File Extension. It is file format of World Wide Web. It is a technique of keeping several images in one file.Gif Animation is specially used in different websites for the banners of advertisement and posters. An animation image different aspects of advertisement can be understood, which is not possible to explain by any other file format of Photoshop. The size of Gif animation file format is very low which can be run very easily in a website.
Easy System to Create Gif Animation
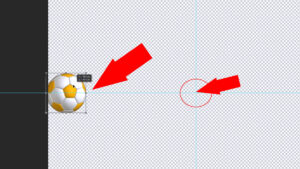
We open a football image. From this image we will show how to create Animated Gif by using Photoshop CS- 6.

We make the background layer 0 by double clicking on background layer. If the image is moved to any side, the image will be transparent background and can be seen in the bottom.
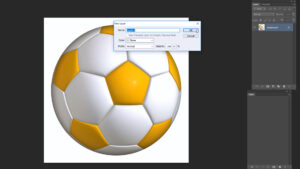
Image Selection and Background Remove
By selecting Pen Tool we do clipping path or cut out the image. After selecting image Select> Modify> Feather 0.5 and by pressing Ctrl + Shift + I drag out from the image. Now we will delete the background by pressing the delete button.
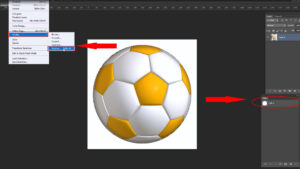
After deleting the background there is only main image and the background will be transparent.

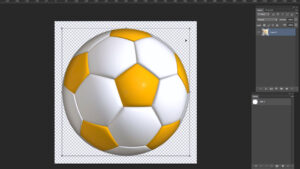
To decrease the size of the image press Ctrl + D then select Deselect. Then transform it by pressing Ctrl + T.
Take an empty layer then color correction that layer and then by pressing Ctrl + T we need to transform the layer by pulling up the ruler till the Guide Line. This guide line will be in the center of the whole image. Place the ball in the middle with the guide line by drag and dropping.
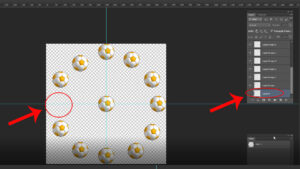
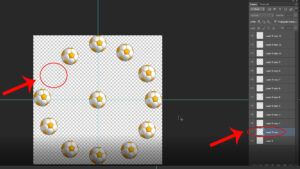
After selecting Move tool from tool box press Alt then copy that image and place it in a form of circle one by one.
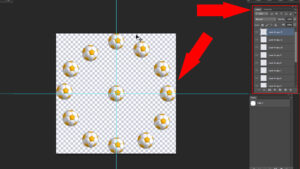
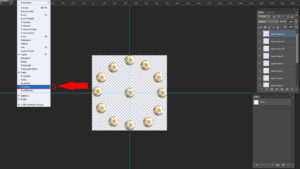
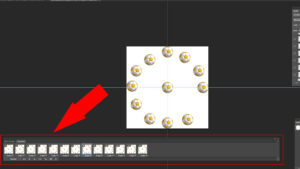
When we place the images like this we can create many layers.Select timeline from Window Menu.
We will see another Timeline option will appear below.
The Timeline below is very important to do animation and the Layer in the Timeline is also important.
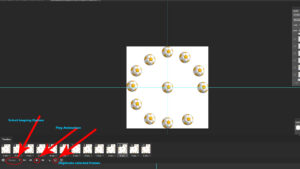
To make it understandable we mark 3 options of Timeline.
- Forever: “Select looping option” is used for running Animation. If you want to run an animation repeatedly then select forever and if you want to set the time for once or two or more then you can select it in here.
- Play Animation: After creating animation if you click Play Icon animation will run.
- Duplicate Selected Frames: You can make large any layer with the help of Duplicate Selected Frames. If you want to add more animations click on this icon.
We can see other icons also which are used for different purposes. One of them is Delete icon. We all know the use of Delete icon. To Delete or Remove any layer we will use Delete icon.Does not matter how many layers are in there but we will see only one layer in timeline.Now to select a new layer click on Duplicate Selected Frames from timeline and after that we will make the layer invisible is at the bottom.
After that we will see the images that we placed before one of them will be invisible.Repeatedly like that select a new layer by clicking on Duplicate Selected Frames from Timeline and make the layer visible which we made invisible earlier and make the upper layer invisible.Now we can see the image which was invisible earlier now it is visible now and with that another image is invisible.
Like that we will select another layer by clicking on Duplicate Selected frames from Timeline and by clicking on layer option we will make the invisible layer visible and we will make the layer invisible above that which is visible.In this way we will create layers in timeline which are there in the layer option.
Click on the Play Animation icon, you can see a beautiful animation which has been created.Depending on our choice we can use it in any color background or use a transparent background.Animation Save: When animation is finished save it on our Gif File Format.
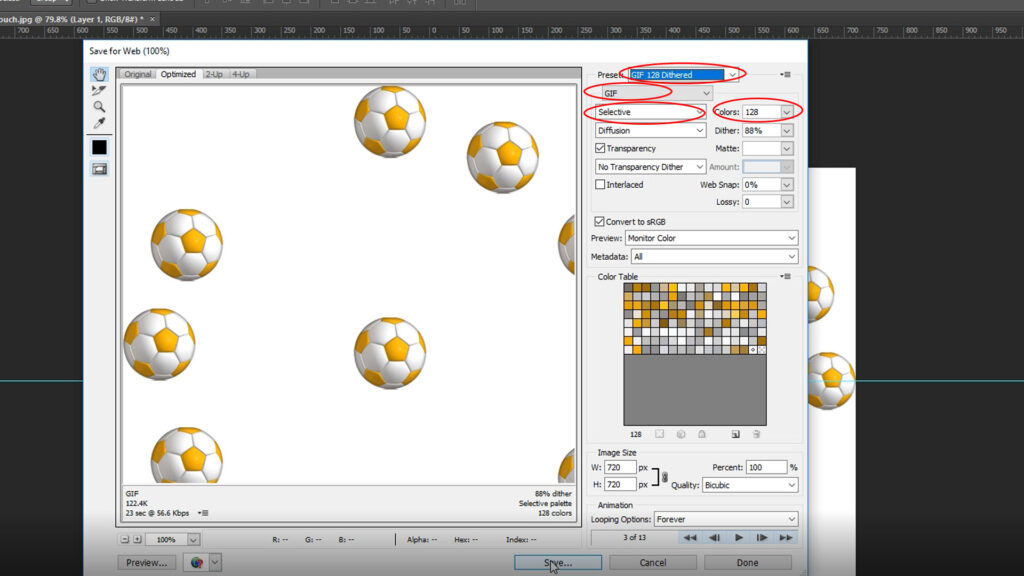
Click on Save for web from File menu to save the image on Gif file Format or press Alt + Shift + Ctrl + S. We will we Save for web device dialogue box. We will select Gif, Gif 128 Dithered, Selective and color-128 from this dialogue box.Then we will save the file by clicking the save icon below.
Open it in any browser it will be animated.We can also see this animation if we open it in Photo Viewer.
It is a very simple method for create Gif animation from any image using Any Photoshop lower version or Update version.