
[ratings]
In this tutorial we will show how easily we can do clipping mask in Photoshop. We will show it even in details, from which you can have a specific idea about how fast and easily clipping mask can be done. For this I am using CS-6. You can use Photoshop Cc or any other version.
What Is Photoshop Clipping Mask?
Clipping mask is a powerful system of controlling Photoshop’s layer visibility. Thus, clipping mask is another kind of layer mask.It might look similar,but clipping mask and layer mask is very much different. Layer Mask is used to show or hide some parts of layer. But clipping mask is used to show the content and transparency of another layer of one layer.
For clipping mask we need 2 images. After that below layer controlsthe upper layer. In other words, below layer will be masked and upper layer will be cut off.
In below layer there will be (type, pixel and shape), the upper layer images will be seen in below layer (type, pixel and shape). Nothing can be seen rather than type, pixel and shape.
How to Do Clipping Mask
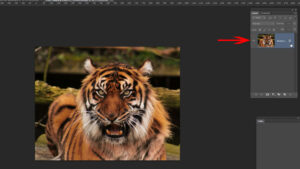
First of all to understand clipping mask, we have to know the difference between content and transparency of a layer. Follow me, you can open any image in Photoshop, I am using my own picture.

After opening the main image we will see in layer option only background layer is available. If we want to make this image invisible then we will double click on the layer and make it 0 layer.
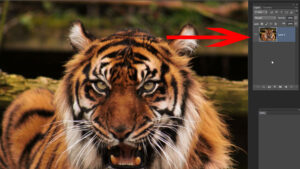
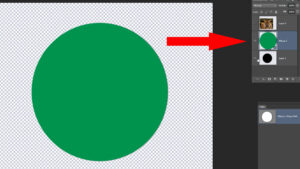
If you have the layer 0 click on the Ctrl+ new layer and click on the empty layer below the 0 layer.
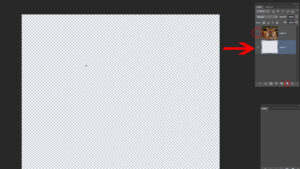
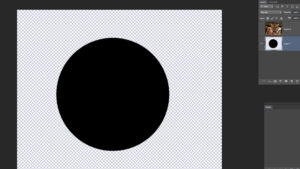
Now we can see as the upper layer is invisible the total transparent image. In transparent layer we will fill color by using Elliptical Marquee tool. We need to create a black shape below the layer. Some parts of layers below will be dark and the other part from the upper part should be filled up.
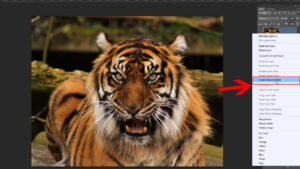
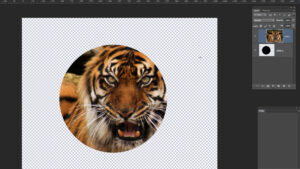
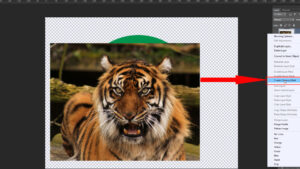
Now place the mouse on upper layer click the right button and then click on – create clipping mask. The shape that has in below layer will be visible in upper layer.
You can see that section of upper layer by pressing Ctrl+ T and dragging and dropping it.
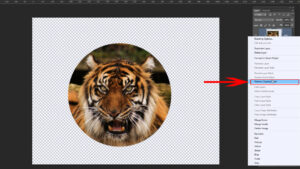
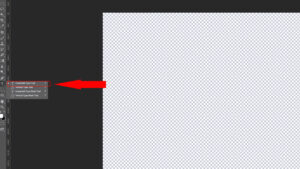
We can release clipping mask. To release clipping mask go to the layer and click on right button of the mouse then click on release clipping mask. It will be back on previous situation.
Clipping Mask in Shape Path
To do clipping mask in shape path first we select Ellipse Tool then we make a round shape below upper layer.
Make the upper layer visible click on the right button to create clipping mask. The lower part of the color below will be visible in the upper layers.
Tex Clipping Mask
We saw how we can do clipping mask by filling color and using any shape. Now we will teach how to show your picture or any other picture within a text via clipping mask.From key board we press T and write anything. We only write TEXT you can your name or anything else.
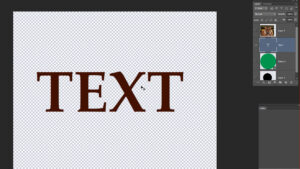
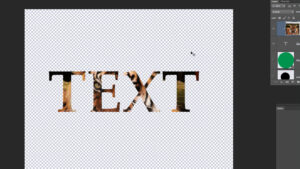
The text layer will be under the image layer. Again we will do upper layer invisible icon visible by applying the previous method and do clipping mask. Now see-
What a imaging!! You can see the previous image within the text. You can drag and drop the previous image and place it as you want to.
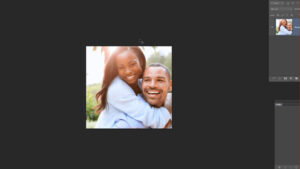
Framing a Picture via Clipping
To place image via clipping mask we have to open two images in Photoshop. One is the picture of the frame and the other one is the picture you want to place in that frame.
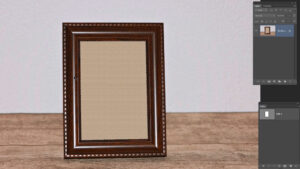
First select a part in frame section. Then we copy a layer by pressing Ctrl+ J from keyboard.
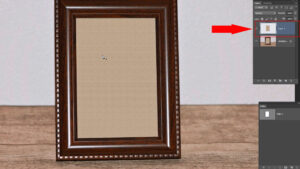
The image that we want to keep on the frame we will have to copy it and have to bring on this layer.

The upper layer must be on the state of visible. To do clipping mask swiftly we have to make the upper layer visible and then click the right button of the mouse then click on create clipping mask.
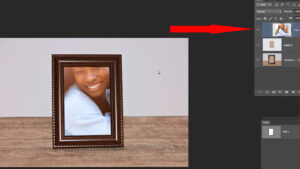
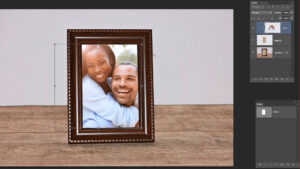
Image Resizing
After doing clipping mask we will resize the image and place it on the frame. We will press Ctrl+ T then click on Free Transform and then press Shift+ Alt make the image small and place it in between the frame precisely. Now by pressing Enter we will close Free Transform.
That’s it. If you want to know more about how to clipping path , ghost mannequin effect and clipping mask in Photoshop check out our video tutorial.